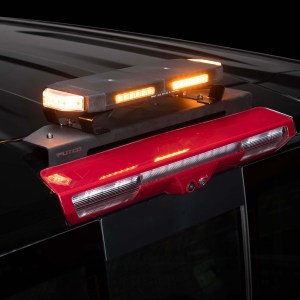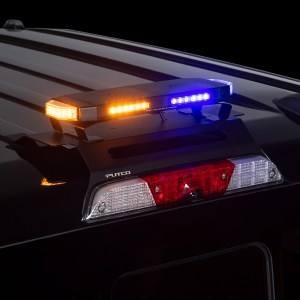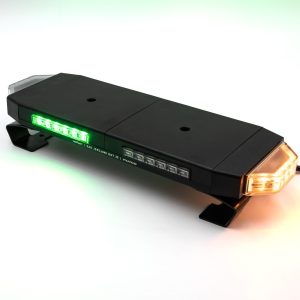
Included Components
Hornet Light Bar (16″, 24″, 36″, or 48″)
Universal C-Brackets (mounting hardware)
Lighted Toggle Switch
6.5 ft Wiring Harness
Important Information
Read all instructions before beginning installation
Verify all parts are included and undamaged
Designed for 12V DC systems
Not all units include every function (see wiring section below)
System Overview (Read This First)
Red Wire = Main Power (through switch)
Black Wire = Ground
All other wires = Ground-triggered functions
All control wires (yellow, white, purple, green, brown) activate when connected to ground, not +12V
Step 1: Mount the Strobe Light Bar (Varies by mounting method)
Install the Hornet light using the included C-brackets or your preferred mounting solution
Position the light securely and tighten all hardware
Ensure the etched side faces forward (direction of travel)
Step 2: Route the Wiring (Varies by mounting method)
Route the wiring from the light into the cab
Run along the headliner, down the C-pillar, and forward to the switch location
Avoid sharp edges, moving parts, and heat sources
Step 3: Connect Power and Switch
Using the included lighted toggle switch:
Connect fused 12V power to one terminal of the switch
Connect the other switch terminal to the red wire (Hornet power)
Connect the black wire from the Hornet directly to chassis ground
This switch controls ON and OFF power to the light bar
Step 4: Connect Optional Control Wires
All function wires are ground-triggered. Connect them to ground through a switch to activate:
Yellow Wire = Pattern Change (tap to ground momentarily to cycle patterns)
White Wire (if equipped) = Color Change (tap to ground momentarily to cycle colors)
Purple Wire (if equipped) = White Override (connect to ground to activate)
Brown Wire (if equipped) = Left Turn Signal (connect to ground to activate)
Green Wire (if equipped) = Right Turn Signal (connect to ground to activate)
How It Works
Flip switch ON = Light powers on
Flip switch OFF = Light shuts off
Tap yellow wire to ground = changes flash pattern
Tap white wire to ground = changes color (if equipped)
The light remembers last selected settings after power is turned off
Wiring Notes
Any unused wires can be left disconnected and safely secured
The light must be powered ON to change patterns or colors
For ongoing control, connect function wires to momentary or auxiliary switches
Use a fused power source for safe operation
Final Check
Confirm all connections are secure
Verify proper function of power, patterns, and optional features
Ensure wiring is safely routed and protected
Installation & Wiring FAQ
What comes in the Hornet light bar kit?
Each kit includes a Hornet light bar (16″, 24″, 36″, or 48″), universal C-brackets for mounting, a lighted toggle switch, and a 6.5-foot wiring harness for installation.
How is the Hornet light powered?
The Hornet light connects to your vehicle’s electrical system using a 12V power source. The red wire connects to power through the included switch, and the black wire connects to ground.
What does the included switch do?
The included lighted toggle switch controls main power ON and OFF to the light bar. When the switch is on, the Hornet light is powered and active.
How do I change flash patterns?
Flash patterns are controlled by the yellow wire. While the light is on, briefly touching the yellow wire to ground will cycle through the available patterns.
What does “ground-triggered” mean?
Ground-triggered means a feature activates when the wire is connected to ground (negative) instead of power. For example, touching the yellow wire to ground tells the light to change patterns.
Does the Hornet light remember my settings?
Yes. The light will remember the last selected flash pattern and color (if equipped) even after it is turned off.
Do I need to connect all the wires?
No. Only the red (power) and black (ground) wires are required for basic operation. All other wires are optional and control additional features. Any unused wires can be safely left disconnected.
What is a C-pillar and why is it mentioned?
The C-pillar is part of your vehicle’s structure inside the cab. It is the vertical support behind the rear door or behind the cab in a truck. Routing wires along the headliner and down the C-pillar helps keep them hidden, protected, and out of the way.
Do I need to run the wires inside the cab?
In most installations, yes. Routing the wires through the cab helps protect them from weather, damage, and visibility issues.
Which side of the light bar faces forward?
The side with the etched logo or marking should face forward toward the direction of travel. This ensures features like turn signals function correctly.
What happens if my light does not change patterns?
Make sure the light is powered on. The Hornet must be receiving power through the red wire for the yellow wire to cycle patterns.
What are the extra wires for?
Depending on your model, additional wires may include: white for color change, purple for white override, brown for left turn signal, and green for right turn signal. All of these activate when connected to ground.
Can I install this myself or do I need a professional?
Most users can install the Hornet light with basic tools and 12V wiring knowledge. If you are not comfortable working with vehicle wiring, professional installation is recommended.
Is this compatible with factory upfitter switches?
Yes. The Hornet light can be connected to factory upfitter switches or aftermarket switch panels for cleaner integration and easier control.
Is the installation complicated?
No. Installation is straightforward with basic power, ground, and optional control wires. No programming or special tools are required.
Additional Help?
For technical support, contact Putco
Phone: 1-800-247-3974
Email: support@putco.com
Hours: Monday to Friday, 8:30 AM to 5:00 PM (Central Time)