How to Install a Plug and Play Tailgate Light Bar (No Cutting or Splicing)
What Is the Putco Freedom Blade?
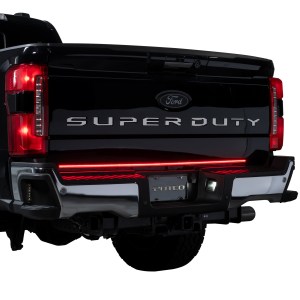
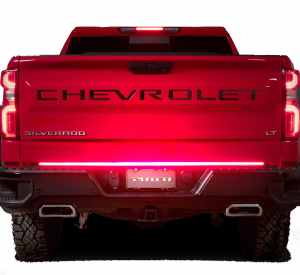
The Putco Freedom Blade LED Tailgate Light Bar is a plug and play tailgate light bar designed for trucks that want brighter reverse lighting, improved brake visibility, and modern LED turn signals without complex wiring.
This installation uses a combination of a 7-pin quick connect harness, relay-powered fuse tap system, and grounded wiring to deliver maximum LED output and reliability.
What You’ll Need
- Putco Freedom Blade LED Tailgate Light Bar
- Blade Quick Connect Harness
- Power wire with relay and fuse tap
- Cable ties and mounting hardware
- At least 90% isopropyl alcohol
- Clean towel
- Wrench or socket set
- Heat gun or lighter
Installation Overview
- Mounts between the tailgate and bumper
- Uses 3M adhesive and optional bracket spacing system
- Connects through factory 7-pin trailer plug
- Uses relay-powered fuse tap for maximum brightness
- Typical install time is 45 to 90 minutes
Step 1: Prepare the Surface
- Clean the mounting area thoroughly using at least 90% isopropyl alcohol
- Dry the surface completely before installation
- Ensure surface temperature is at least 60°F for proper adhesion
- Verify the light bar will not contact the tailgate when opening
Step 2: Install Mounting Brackets (If Needed)
- Apply 3M tape to the black plastic brackets
- Attach brackets to the back of the light bar
- Space evenly across the length of the bar
- Use brackets if the truck surface is uneven or obstructed
- Position the light bar with the wire exiting toward the driver side
Optional:
- Brackets can be bolted to the truck using #10 hardware for permanent mounting
Step 3: Mount the Light Bar
- Test fit before removing adhesive backing
- Remove tape liner only after confirming position
- Press firmly into place across the mounting surface
- Apply even pressure to ensure full adhesion
Step 4: Install the Quick Connect Harness
- Locate the factory 7-pin trailer plug behind the bumper
- Unplug the factory connector
- Plug it into the Blade Quick Connect Harness
- Connect the harness back into the truck’s 7-pin port
- Connect the 4-pin plug to the Freedom Blade driver box
- Ensure all connectors are fully seated and sealed
Step 5: Install the Power Wire and Relay System
- Mount the relay box near the battery and fuse box
- Attach the ground (black wire) to a factory ground or battery negative
- Connect the red wire to the battery positive terminal
- Install the fuse tap into an ignition-controlled fuse slot
- Route the power wire safely along the frame toward the rear of the truck
- Secure wiring every 12 to 18 inches using cable ties
Why this matters:
- This relay-powered setup delivers maximum LED output
- Prevents voltage drop common with trailer-only installs
- Ensures consistent brightness and performance
Step 6: Mount the Driver Box
- Mount the driver box behind the bumper using bolts or 3M tape
- Use multiple mounting points to reduce vibration
- Choose a flat, secure surface when possible
Step 7: Connect the System
- Connect the power wire to the driver box using the spade terminal
- Apply heat shrink over the connection for a waterproof seal
- Connect the 4-pin and weatherpack connectors securely
- Do not cross-connect mismatched connectors
- Bundle and secure excess wiring
Step 8: Configure the Freedom Blade (Optional)
- Use the orange tap wire to enter configuration mode
- Select your preferred:
- Startup sequence
- Turn signal style (amber or red, scanning or solid)
- Brake style (standard or triple pulse)
- Wait 5 seconds to save each setting
- Do not turn the truck off during configuration
Step 9: Test All Functions
- Turn the vehicle on
- Verify all lighting functions:
- Running lights
- Brake lights
- Turn signals
- Reverse lights
- Startup sequence
- Use a second person to confirm visibility from the rear
Why This Is a High-Performance Plug and Play System
- No wire cutting required
- Uses factory 7-pin connections
- Includes relay-powered fuse tap system
- Designed for maximum brightness and reliability
- Fully sealed connections for long-term durability
Common Installation Questions
Do I need to splice any wires?
No. This system uses plug and play connections with a quick connect harness.
Can I install this using only the trailer plug?
Yes, but adding the power wire and relay system provides significantly better brightness and performance.
Why does this use a fuse tap and relay?
This allows the light bar to draw direct battery power while using the fuse as a trigger, improving output and consistency.
How long does installation take?
Most installs take between 45 and 90 minutes depending on routing and mounting.
Will this drain my battery?
No. When connected to an ignition-controlled fuse, the system only powers on when the vehicle is running.
Final Thoughts
The Putco Freedom Blade installation is designed to be straightforward while still delivering professional-grade performance. With its quick connect harness, relay-powered wiring, and configurable lighting modes, it offers one of the most advanced plug and play tailgate light bar setups available.
For truck owners who want maximum visibility, reliable performance, and a clean install without cutting into factory wiring, this system delivers exactly that.
Explore More Freedom Blade Guides
- Why Cheap Tailgate Light Bars Fail
- Putco Freedom Blade LED Tailgate Light Bar – Explained
- Putco Freedom Blade vs Amexmart Tailgate Light Bar: Premium vs Budget Option
- Putco Freedom Blade vs XKGlow Tailgate Light BarPutco Freedom Blade vs XKGlow Tailgate Light Bar