Freedom Blade Not Turning On
- –Step 1: Inspect for corrosion or broken contacts
- 4-Pin Flat Connector – Unplug, check, and reconnect.
- Verify that none of the pins are corroded or broken.
- Barrel Connector – Unplug, inspect the pins, and reconnect.
- Verify that the indexing pin is lined up when connecting the two connectors. Do NOT force the connection if there is resistance.
- Plug-and-Play Harness – Inspect to ensure everything is seated properly.
- Verify that no pins are bent or corroded.
- Verify you have 12v+ coming in from the wire from the battery. (If you do not have a voltmeter, try the power wire test below).
- Verify that no pins are bent or corroded.
- 4-Pin Flat Connector – Unplug, check, and reconnect.
- -Step 2: Gently inspect the cable on the driver side of the light bar. Wiggle it slightly to see if the light bar flickers or changes color.
Driver-Side Taillight Shuts Off
When the truck’s driver-side taillight turns off, it typically indicates that the power wire relay harness is not supplying 12V+ power to the Freedom Blade.
- Verify that the fuse tap is installed correctly, with the 7.5A fuse in the top slot and the truck’s original fuse in the bottom slot.
- Verify that the fuse tap is connected to an ignition-switched fuse location.
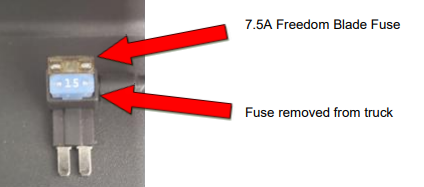
- Verify that when power is applied to the relay harness, an audible click is heard, confirming that the relay has activated.
- To test the relay, briefly touch both prongs of the fuse tap to the positive battery terminal and listen for the relay to click.
- With the truck in Accessory mode or running, use a voltmeter (or the power wire test below) to verify that the wire at the driver box is receiving 12V+ power from the battery.
- Safety: Place the vehicle in Park, engage the parking brake, and keep all loose wires away from moving or hot components.
Power Wire Test
If a voltmeter or digital multimeter is not available, use the following test to verify that the power wire harness is functioning properly.
Safety: Place the vehicle in Park, engage the parking brake, and keep all loose wires away from moving or hot components.
- –Connect the light bar.
- With the power wire and quick-connect harness installed, connect the harness’s 4-pin connector to the light bar, ensuring that only the black ground wire is connected
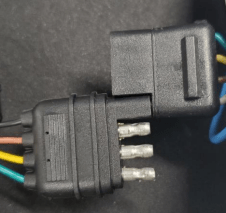
- –Connect the driver box
- -Connect the power wire to the driver box.
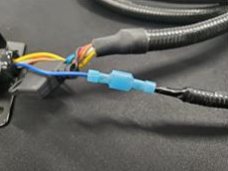
- –Start the vehicle and observe the light bar.
- When the vehicle starts, the light bar should briefly illuminate white, run through its startup sequence, and then turn off.
- –If the light bar completes the startup sequence: The power and ground connections are functioning. Turn off the vehicle and reconnect the 4-pin harness in its normal configuration.
- –If the light bar does not turn on: The power wire may not be supplying +12 VDC, or the harness may not have a proper ground connection. Inspect both connections before continuing.
- When the vehicle starts, the light bar should briefly illuminate white, run through its startup sequence, and then turn off.
Check Engine Light Appears After Installation
When the check engine light appears after installing the Freedom Blade, it typically indicates that one of the fuses is missing from the fuse tap or one of the fuses has blown.
- Verify that the fuse tap is installed correctly, with the 7.5A fuse in the top slot and the truck’s original fuse in the bottom slot.
- Verify that both fuses are intact and not blown.
- Verify that the fuse tap is connected to an ignition-switched fuse location.
- Verify that both fuses are intact and not blown.
Wireless Remote Is Not Working
If your Putco Luminix Tap-N-Sync Remote is not working or responding properly, we recommend checking the following items:
- Verify that the remote battery has sufficient power. Press any button on the remote and confirm that the indicator light illuminates brightly and is not dim.
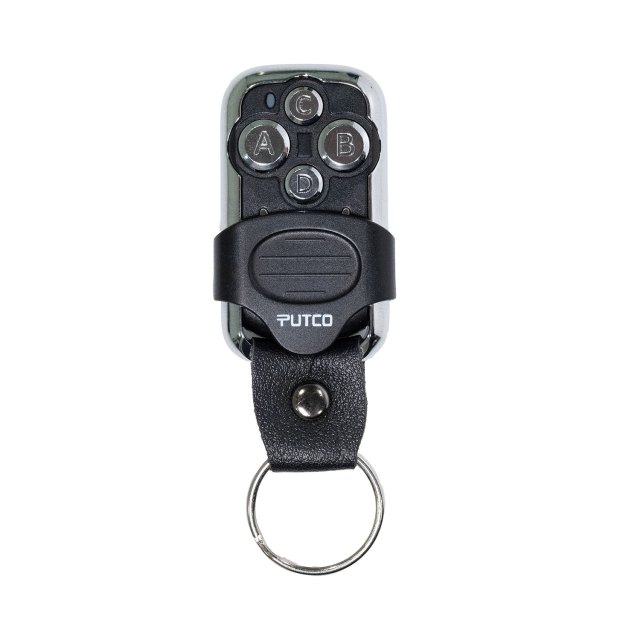
- Verify that all wiring connections are correct and securely connected.
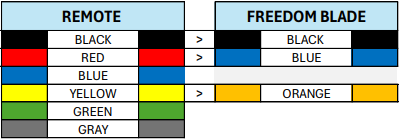
- Connect the black wire to the black wire coming from the Freedom Blade driver box.
- Connect the red wire to the blue wire coming from the power wire harness routed back to the battery.
- Connect the yellow wire to the orange programming wire.