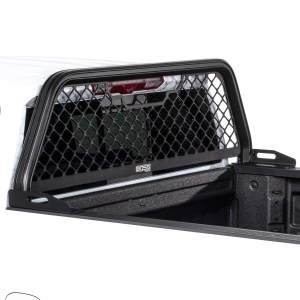
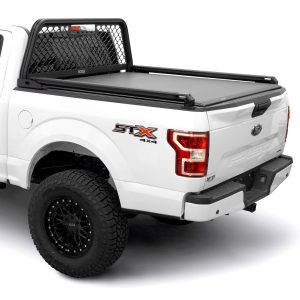
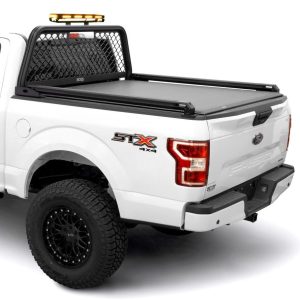
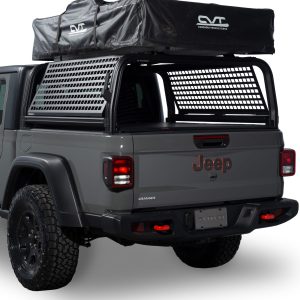
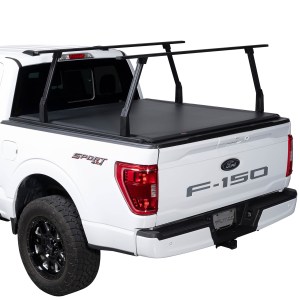
The BOSS racks are stake-pocket mounted aluminum racks designed for cab protection and modular cargo mounting. Built from 6061-T6 aluminum with a rugged appearance and corrosion-resistant finish, they provide a lightweight yet durable solution for expanding truck utility without permanent modification in most applications.
This guide covers fitment, required tools, installation steps, accessory integration, and long-term care for a clean OEM-style installation on supported trucks.
Putco BOSS Rack Fitment & Compatibility Check
If fitment has not already been confirmed during the purchasing process, verify compatibility with your truck configuration and any existing bed accessories before beginning installation. In addition to tonneau covers, pay particular attention to:
- – Utility rail systems that may interfere with bracket placement or bed rail access
- – Bed rail caps or rail guards that cover or alter stake pocket openings
- – Ladder racks or other stake-pocket-mounted accessories already using the mounting locations
- – Toolboxes that mount to or clamp over the bed rails
Required Tools & Hardware
Tools Needed
- – X-Acto knife or razor blade (for stake pocket access if required)
- – Tape measure
- – Ratchet with 9/16” socket
- – 3/16” hex key or Allen socket
- – Power drill with 5/16” drill bit (optional reinforcement step only)
- – Rubber bands (optional)
- Optional Pro Tips
- – Tape (Alignment)
- – Clamps to prevent tipping over if working alone)
Included Hardware
- – Mounting brackets and threaded plates (2 sets)
- – 5/16” x 3.25” bolts and 5/16” x 1.25” bolts
- – 3/8” x 1.5” bolts and 5/16” flange locknuts
- – Flat washers (Ford applications)
- – Oval washers (GM and RAM applications)
- – Rubber bands (used for bracket pre-assembly)
Putco BOSS Rack Installation Steps (Stake Pocket Install)
⚠️ Before beginning, place a protective blanket or towel over the rear cab glass. Although the racks are lightweight at approximately 40 lbs, their size and leverage can make them awkward to handle during positioning. Also, a second person is recommended for final alignment.
Step 1: Bracket & Stake Pocket Setup
- Expose stake pockets if needed
If bed caps cover stake pockets, carefully cut along factory-marked lines to open access points. - Assemble bracket components
Use rubber bands to secure the threaded plate to the mounting bracket. Ensure the threaded opening remains unobstructed. - Position bracket assembly
Thread a 3.25” bolt loosely into the bracket as a handling guide and lower the assembly into the stake pocket. - Secure inner bed connection
From inside the bed, install the 3/8” bolt using the correct washer type:
– Oval washer: GM / RAM applications
– Flat washer: Ford applications
Start threads by hand, then remove the temporary guide bolt.
- Repeat on opposite side
Leave all hardware loosely installed to allow final adjustment.
Step 2: Rack Positioning & Alignment
- Set racks in place
Carefully position the rack onto the bed rails and align mounting feet with installed brackets.
Alignment Pro Tip (Improved Accuracy Method)
When installation space makes measuring difficult, use one of the following methods:
Method 1: Mark-and-Transfer Technique
- – Position the rack where the final placement is desired, focusing on one side
- – Use painter’s tape to mark the rack mount’s position
- – Slide or reposition the rack out of the way, secure so it does not tip over
- – Measure from the cab to your mark while the rack is not obstructing access
- – Transfer that measurement to the opposite side and mark
- – Reposition the rack using the reference marks for precise alignment
Method 2: Solo Installation Clamping Method
- – If working alone, use soft-jaw clamps or padded clamps to temporarily hold one side of the rack in position
- – This stabilizes the rack while adjustments are made on the opposite side
- – Once one side is secured and measured, repeat the process on the second side for matching alignment
These methods help eliminate guesswork when physical space limits direct measurement along the cab line.
- Install upper mounting bolts
Insert 3.25” bolts through rack feet into threaded plates. Hand-tighten only. - Align racks precisely
Use a tape measure to confirm equal spacing:
[Driver Side Gap] ←—— MUST MATCH ——→ [Passenger Side Gap]
Do not rely on visual alignment alone. Even minor misalignment can create uneven load distribution and may contribute to unwanted movement or noise over time. After positioning the racks, use a tape measure to verify that the distances from the bed rails and cab are equal on both sides before final tightening.
Phase 3: Final Tightening Sequence
- Final tightening order
- – Tighten inner 3/8” bed bolts first
- – Then tighten upper 3.25” rack bolts
⚠️ Avoid overtightening, as excessive torque can place unnecessary stress on bed rail mounting points and may lead to deformation or cracking in extreme cases.
Phase 4: Optional Heavy-Duty Reinforcement
For most applications, stake-pocket mounting provides sufficient strength for normal use.
For commercial or heavy-duty applications involving frequent tie-down of shifting loads such as lumber, pipe, or recovery equipment, optional reinforcement is available.
- Drill-through reinforcement (optional)
Using the pre-aligned mounting point, drill a 5/16” hole through the bed rail and secure using the 1.25” bolt and flange locknut.
Skip this step for a fully reversible installation.
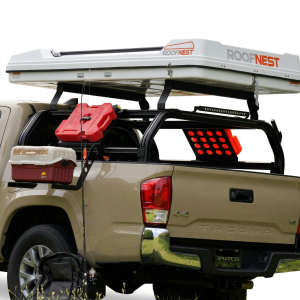
TEC Channel System: Accessories, Mounting & Wiring Options
The racks feature integrated TEC channels that allow modular accessory mounting without drilling into the structure.
Common Accessories for Dual T-Channel
- – LED light bars and work lighting systems
- – Tie-down anchors and cargo retention systems
- – Tool Mounts
- – CB or GMRS radio antenna mounts
- – Flag mounts
- – Tie-down anchors, D-rings, Ratchet strap hooks
- – Fire extinguisher mounts
Wiring Routing Tip
Route wiring through the hollow vertical supports and down into the stake pocket area to protect wiring from exposure and maintain a clean installation appearance.
Common Installation Mistakes to Avoid
- – Fully tightening one side before centering rack
- – Can cause uneven load distribution and misalignment across bed rails
- – Skipping cab protection during installation
- – Increases risk of accidental contact with rear glass during positioning
- – Using incorrect washer types for vehicle application
- – Can lead to uneven clamping force and reduced long-term stability
- – Over-cutting stake pocket openings in bed caps
- – Can weaken plastic bed cap structure and reduce fitment integrity
- – Failing to re-torque hardware after initial use
- – May allow hardware to loosen as the racks settle under vibration
- – Assuming all tonneau cover styles are compatible
- – Can result in interference with mounting brackets or stake pocket access
- – Overtightening mounting hardware
- – Can place excessive stress on bed rail mounting points and potentially deform or crack surrounding material under extreme load conditions
Theft-Resistant Hardware Option: For added peace of mind, the included mounting hardware can be replaced with compatible security hardware that requires a specialized driver for removal. Security fasteners, such as tamper-resistant Torx-style bolts, can help deter unauthorized removal when trucks are regularly parked outdoors or left unattended for extended periods.
Putco BOSS Rack Maintenance & Care Tips
The 6061-T6 aluminum construction provides long-term corrosion resistance and avoids traditional steel rust concerns.
Recommended Maintenance
- – Wash with standard automotive soap and water
- – Avoid acidic or alkaline pre-soak washes and abrasive pads
- – Periodically clear TEC channels of debris and road salt
- – Re-torque hardware after the first 100 miles of use
- – Inspect hardware during routine maintenance intervals
Installation FAQs
How do you install Putco BOSS headache racks?
Installation uses a stake pocket brackets and standard hand tools. Proper alignment ensures a secure OEM-style fit without permanent modification in most applications.
Do Putco BOSS racks require drilling?
No drilling is required for standard installation. Optional reinforcement drilling may be used for heavy-duty applications.
Are Putco BOSS racks compatible with tonneau covers?
Inside-the-rail tonneau covers are typically compatible. Over-the-rail systems may interfere with stake-pocket mounting points.
Can racks be installed alone?
Yes, but installation is significantly easier with two people during final positioning and alignment due to rack size and leverage.
Final Summary
The BOSS racks are designed to provide cab protection and modular cargo mounting through a lightweight aluminum stake-pocket mounting system. When properly installed and aligned, they deliver a secure OEM-style fit while maintaining compatibility with factory lighting and camera systems. The integrated TEC channel system further expands functionality by allowing flexible accessory mounting without additional drilling into the racks.